Table
| Support | |
|---|---|
| Events | No |
You can display data rendered in a table by using New-PodeWebTable, and you can also render certain other elements within a table such as:
- Buttons
- Badges
- Spinners
- Icons
- Links
A table gets its data from a supplied -ScriptBlock, more information below, and you can also -AutoRefresh a table to fetch new data every minute. Tables also support being sorted, paginated, clickable and filtered.
Data
To supply data to be rendered in a table, you have to supply a -ScritpBlock which returns the appropriate data in the correct format. You can also supply other elements to be rendered within the table, within the data that's returned.
You can pass values to the scriptblock by using the -ArgumentList parameter. This accepts an array of values/objects, and they are supplied as parameters to the scriptblock:
New-PodeWebTable -Name 'Example' -ArgumentList 'Value1', 2, $false -ScriptBlock {
    param($value1, $value2, $value3)

    # $value1 = 'Value1'
    # $value2 = 2
    # $value3 = $false
}
Raw
The data format to be returned from a table's -ScriptBlock is simple, it's purely just Key:Value in an ordered hashtable/pscustomobject.
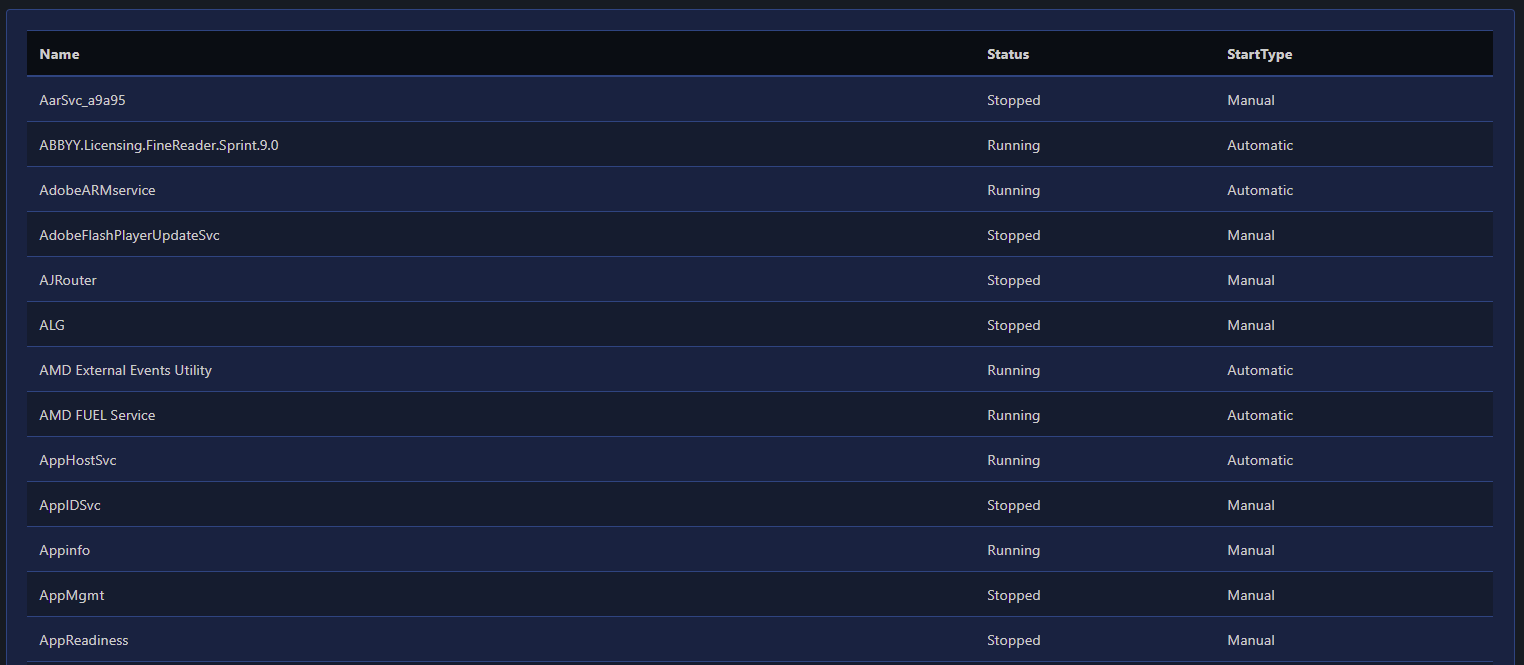
The following example renders a table for services on a computer, displaying the Name, Status and StartTypes of the services:
New-PodeWebContainer -Content @(
    New-PodeWebTable -Name 'Services' -ScriptBlock {
        foreach ($svc in (Get-Service)) {
            [ordered]@{
                Name      = $svc.Name
                Status    = "$($svc.Status)"
                StartType = "$($svc.StartType)"
            }
        }
    }
)
which renders a table that looks like below:

Elements
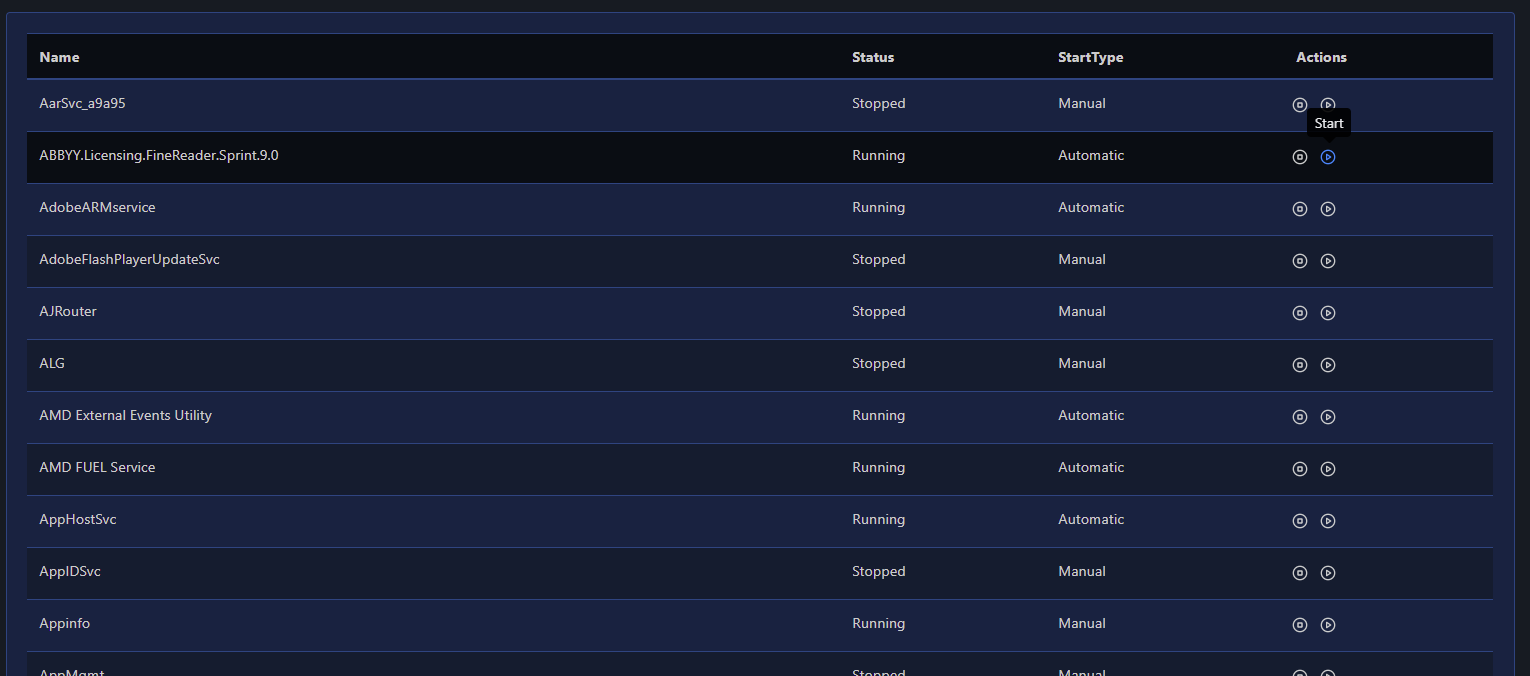
Extending on the raw example above, you can also render certain elements within a table. Let's say you want two buttons in the table, one to start the service, and one to stop the service; to do this, we just have to use New-PodeWebButton within the returned hashtable. So that the button's scriptblock knows which services we which to stop/start, we'll need to supply -DataColumn Name to the table; when a button within the table is clicked, the value of the Name column in that button's row will be available via $WebEvent.Data.Value in the button's scriptblock.
New-PodeWebContainer -Content @(
    New-PodeWebTable -Name 'Services' -DataColumn Name -ScriptBlock {
        foreach ($svc in (Get-Service)) {
            [ordered]@{
                Name      = $svc.Name
                Status    = "$($svc.Status)"
                StartType = "$($svc.StartType)"
                Actions   = @(
                    New-PodeWebButton -Name 'Stop' -Icon 'Stop-Circle' -IconOnly -ScriptBlock {
                        Stop-Service -Name $WebEvent.Data.Value -Force | Out-Null
                        Show-PodeWebToast -Message "$($WebEvent.Data.Value) stopped"
                        Sync-PodeWebTable -Id $ElementData.Parent.ID
                    }
                    New-PodeWebButton -Name 'Start' -Icon 'Play-Circle' -IconOnly -ScriptBlock {
                        Start-Service -Name $WebEvent.Data.Value -Force | Out-Null
                        Show-PodeWebToast -Message "$($WebEvent.Data.Value) started"
                        Sync-PodeWebTable -Id $ElementData.Parent.ID
                    }
                )
            }
        }
    }
)
which renders a table that looks like below:

CSV
There's also the option to render a table straight from a CSV file. If you supply the path to a CSV file via -CsvFilePath, then the table will be built using that file:
New-PodeWebContainer -Content @(
    New-PodeWebTable -Name 'Users' -DataColumn UserId -CsvFilePath './users.csv'
)
Options
Compact
If you have a lot of data that needs to be displayed, and you need to see more on the screen without scrolling, you can supply the -Compact switch to New-PodeWebTable. This will remove extra padding space on rows, to help show more data than normal.
Click
You can set a table's rows to be clickable by passing -Click. This by default will set it so that when a row is clicked the page is reloaded, and the -DataColumn value for that row will be set in the query string as ?value=<value> - available in $WebEvent.Query.Value.
You can set a dynamic click action by supplying the -ClickScriptBlock parameter. Now when a row is clicked the scriptblock is called instead, and the -DataColumn value will now be available via $WebEvent.Data.Value within the scriptblock. The scriptblock expects the normal output actions to be returned.
Any values specified to -ArgumentList will also be passed to the -ClickScriptBlock as well.
Filter
You can set a table to be filterable by passing the -Filter switch; this will cause a textbox to be rendered above the table. Any value typed into this textbox will, after a small delay, re-call the table's -ScriptBlock and the filter value will be available in $WebEvent.Data.Filter. You can then return the filtered data and the table will be reloaded:
New-PodeWebTable -Name 'Example' -Filter -AsCard -ScriptBlock {
    # load a csv file
    $filePath = Join-Path (Get-PodeServerPath) 'misc/data.csv'
    $data = Import-Csv -Path $filePath

    # apply filter if present
    $filter = $WebEvent.Data.Filter
    if (![string]::IsNullOrWhiteSpace($filter)) {
        $filter = "*$($filter)*"
        $data = @($data | Where-Object { ($_.psobject.properties.value -ilike $filter).length -gt 0 })
    }

    # update table
    return $data
}
There's also a -SimpleFilter switch available, if you supply this instead of -Filter then a textbox is still displayed, however the filter is done directly via javascript and only applied to the current page. (useful for small tables displaying all data).
Paginate
You can set a table to support paging by passing -Paginate. This will auto-paginate the table data into pages of 20 items, which can also be configured via -PageSize:
New-PodeWebTable -Name 'Example' -Paginate -AsCard -ScriptBlock {
    # load the file
    $filePath = Join-Path (Get-PodeServerPath) 'misc/data.csv'
    $data = Import-Csv -Path $filePath

    # update table (Pode.Web will auto-paginate for you)
    return $data
}
You can take control of the paging yourself, useful for querying databases, by using the values from $WebEvent.Data.PageIndex and $WebEvent.Data.PageSize. Once you have the pre-paged data, you will need to directly pass this into Update-PodeWebTable along with the -PageIndex and the -TotalItemCount:
New-PodeWebTable -Name 'Example' -Paginate -AsCard -ScriptBlock {
    # load the file
    $filePath = Join-Path (Get-PodeServerPath) 'misc/data.csv'
    $data = Import-Csv -Path $filePath

    # apply paging
    $totalCount = $data.Length
    $pageIndex = [int]$WebEvent.Data.PageIndex
    $pageSize = [int]$WebEvent.Data.PageSize
    $data = $data[(($pageIndex - 1) * $pageSize) .. (($pageIndex * $pageSize) - 1)]

    # update table
    $data | Update-PodeWebTable -Name 'Dynamic Users' -PageIndex $pageIndex -TotalItemCount $totalCount
}
Important
If you don't pass the data into the Update-PodeWebTable output action, then Pode.Web will do this automatically and use the auto-paging - which won't have the desired results!
Sort
You can set a table to be sortable by passing the -Sort switch. When passed then clicking a table's headers will re-call the table's -ScriptBlock; the name of the column to be sorted, as well as the direction (asc/desc), will be available in $WebEvent.Data.SortColumn and $WebEvent.Data.SortDirection. You can then return the sorted data and the table will be reloaded:
New-PodeWebTable -Name 'Example' -Sort -AsCard -ScriptBlock {
    # load the file
    $filePath = Join-Path (Get-PodeServerPath) 'misc/data.csv'
    $data = Import-Csv -Path $filePath

    # apply sorting
    $sortColumn = $WebEvent.Data.SortColumn
    if (![string]::IsNullOrWhiteSpace($sortColumn)) {
        $descending = ($WebEvent.Data.SortDirection -ieq 'desc')
        $data = @($data | Sort-Object -Property { $_.$sortColumn } -Descending:$descending)
    }

    # update table
    return $data
}
There's also a -SimpleSort switch available, if you supply this instead of -Sort then sorting is done directly via javascript and only applied to the current page. (useful for small tables displaying all data).
Columns
You can set how certain columns in a table behave, such as: width, alignment, display name, and header icon. You can do this via Initialize-PodeWebTableColumn, and by passing these columns into -Columns of New-PodeWebTable.
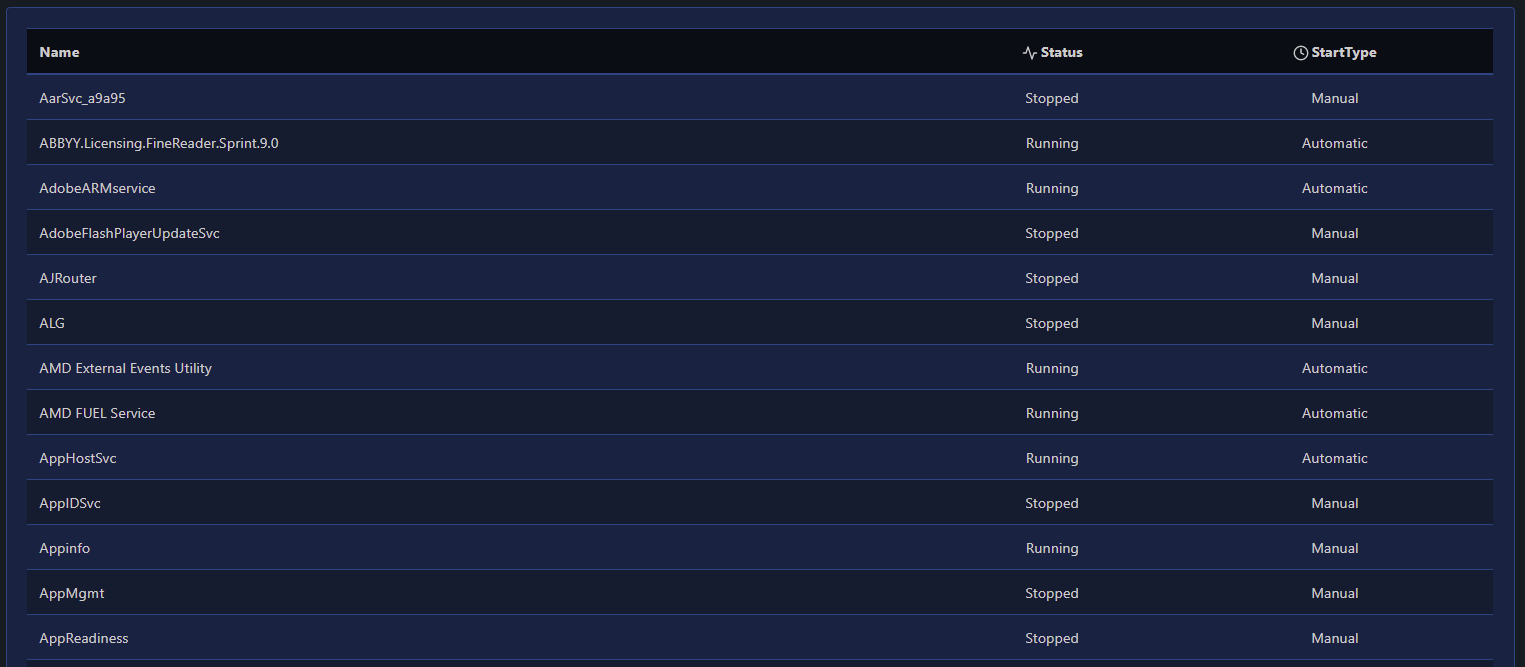
For example, using the services examples above, you can centrally align the Status/StartType columns and give them icons:
New-PodeWebContainer -Content @(
    New-PodeWebTable -Name 'Services' -ScriptBlock {
        foreach ($svc in (Get-Service)) {
            [ordered]@{
                Name      = $svc.Name
                Status    = "$($svc.Status)"
                StartType = "$($svc.StartType)"
            }
        }
    } `
    -Columns @(
        Initialize-PodeWebTableColumn -Key Status -Alignment Center -Icon Activity
        Initialize-PodeWebTableColumn -Key StartType -Alignment Center -Icon Clock
    )
)
which renders a table that looks like below:

You can also use the -Hide switch so a particular column isn't displayed on the page.
Width
The -Width of a table column has the default unit of %. If 0 is specified then auto is used instead. Any custom value such as 100px can be used, but if a plain number is used then % is appended.
Buttons
At the bottom of a table, there are usually two buttons on the left: Refresh and Export. You can add more buttons to a table by piping a new table into Add-PodeWebTableButton:
$table = New-PodeWebTable -Name 'Services' -ScriptBlock {
    foreach ($svc in (Get-Service)) {
        [ordered]@{
            Name      = $svc.Name
            Status    = "$($svc.Status)"
            StartType = "$($svc.StartType)"
        }
    }
}

$table | Add-PodeWebTableButton -Name 'Excel' -Icon Database -ScriptBlock {
    $WebEvent.Data | Export-Csv -Path $path -NoTypeInformation
}

New-PodeWebContainer -Content $table